Woodworking Safety for Beginners
As an Amazon Associate, this website earns from qualifying purchases.
The safety habits to build before your first cut: protective gear, a workspace that behaves, power-tool rules, dust, finishes, and when to stop and get help.
Sections11
Read this before your first cut
Woodworking involves sharp edges, fast-moving cutters, fine dust and chemical finishes. None of that makes it something to avoid, or something to be casual about. The habits below take seconds and are what experienced people do without thinking. Build them now, while you have no habits at all, and you never have to unlearn anything.
Two things frame this page. First, this guidance supplements the manual that came with your own tool; it never replaces it. Your tool's maker knows that model, so follow what it says, including anywhere it contradicts something here. Second, this is general beginner guidance in line with the kind of home power-tool advice the U.S. Consumer Product Safety Commission publishes, and it cannot cover your particular tools, materials or space. Read the safety disclaimer, and start from the woodworking basics hub for the skills these habits sit under.
Protective gear
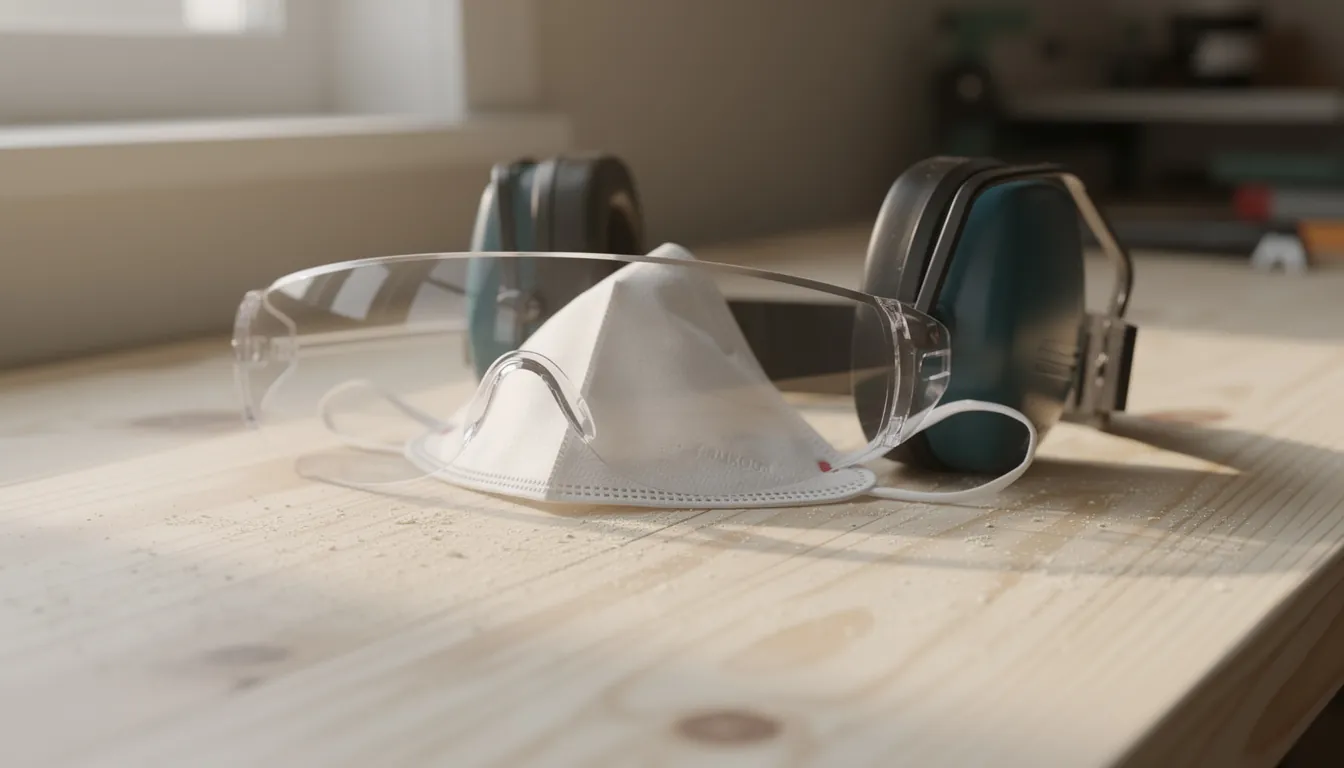
Eye protection, always. Whenever anything is cut, drilled, driven or sanded, hand tools included, and including the quick cut you were only going to take a second over. Chips leave a saw or a drill fast and do not travel where you expect. Prescription glasses are not eye protection; wear impact-rated safety glasses or goggles over them.
Hearing protection for power tools. Circular saws, routers, planers and shop vacuums are loud enough to matter, and noise-related hearing loss is gradual and permanent. Defenders or plugs live next to the tool, not in a drawer.
A fine-particle dust mask for sanding. A basic nuisance mask is not enough. Use a mask rated for fine particles, check that it seals against your face, and put it on before you start rather than once the air is already full.
No gloves near rotating cutters. No loose sleeves, hanging cords or drawstrings, dangling jewellery or watch straps, and long hair tied back. A glove that catches on a spinning bit takes your hand with it. Gloves are for handling rough boards, and they come off before the tool goes on.
A basic set of safety glasses, ear defenders and a dust mask costs less than most single tools and is the first thing to buy, before the saw.
The workspace
Most of what goes wrong is the space, not the tool.
Keep the floor clear. Offcuts, cords and a coiled extension lead are trip hazards, and tripping while holding something sharp is the version that hurts. Sweep between operations, not at the end.
Get proper light on the cut line. If you are squinting at a pencil line you are guessing, and guessing is where the saw wanders.
Route cords away from the cutting path and behind you. Check leads and plugs before every session, and stop using anything with a cracked case, an exposed conductor or a plug that gets warm.
Clamp the work. Every time. Never hold a piece with one hand and cut with the other, and never hold small parts near a moving cutter — clamp them, use a jig, or cut the part free from a longer piece afterwards. This one habit prevents more beginner injuries than any other.
Know where the plug or the isolator is before you switch anything on, so stopping is instant.
Power-tool rules
These apply to every tool, corded or cordless.
Guards stay on and stay working. A guard that has been taped back, wedged or removed is the difference between a near miss and an injury. If one is sticking, fix it or stop using the tool.
Never defeat a safety switch. Trigger locks, no-volt releases and dead-man switches exist because a tool that restarts by itself, or keeps running when dropped, is dangerous. Do not tie a trigger down.
Unplug the tool, or take the battery out, before changing a blade or bit, adjusting a guard or fence, or clearing a jam. Not switched off — disconnected. A tool that starts while your fingers are in it is the classic accident, and it takes a moment to remove the possibility.
Let a tool stop on its own. Do not slow a blade or disc with your hand or the workpiece, and do not put a tool down until it has stopped moving.
Use the right tool for the cut and let it work at its own speed. Forcing a blade, or using a small tool for a job it was never meant for, makes it bind, kick or overheat. If it sounds strained, back off.
Inspect before you start: cord, plug, guard, blade or bit tight and sharp, nothing loose. A blunt blade needs more force and is harder to control than a sharp one. The power tools guide for beginners covers what each tool is for before you buy or borrow one.
Dust is a genuine hazard
Wood dust is a respiratory hazard, and the finest particles are the ones you cannot see hanging in the air after you stop. Sanding, and cutting sheet goods such as MDF, produce a lot of them.
Some species also cause allergic reactions — skin irritation or breathing symptoms — in some people, and sensitivity can develop over time in someone previously unaffected. Look up the wood you are about to use, treat an unfamiliar species with more caution rather than less, and stop if a particular timber leaves you with a rash, streaming eyes or wheezing.
Practically: work outdoors or with ventilation where you can, connect a vacuum or extraction to sanders and saws, wear a fine-particle mask, and clean up by vacuuming or wiping with a damp cloth rather than blowing dust about. Take the mask off outside the dusty area, not in it.
Glues, finishes and solvents
Read the label on every glue, finish, stain and solvent before you open it, and follow what it says about ventilation, skin contact and disposal. The label is the authority, not a project guide.
Work in ventilated air. Many finishes and solvents give off vapours you should not be breathing in a closed garage, and some are flammable, so keep them away from heaters, pilot lights and anything that sparks.
Oil-finish rags need particular care. As an oil finish cures it gives off heat, and a heap of oily rags can self-heat and catch fire with no flame involved. Spread each rag out flat and singly, outdoors, away from anything combustible, until it is dry and stiff — or dispose of it exactly as the maker's label states. Never leave them balled up in a bin or a pocket.
Keep containers closed, labelled, and out of reach of children and pets.
Wood you should not cut
Do not cut wood you cannot identify — salvaged timber, old furniture, pallets. You do not know what it was treated with or what is inside it.
Do not sand or cut painted wood of unknown age. Older paint may contain lead, and disturbing it creates hazardous dust, particularly around children and pregnant women. Leave it and get informed advice.
Pressure-treated timber is for outdoor structural use, not indoor projects, and never for anything that touches food. It carries its own handling instructions from the supplier covering cutting, dust, gloves and disposal — follow those, and never burn the offcuts.
Check reclaimed boards for hidden metal before a blade goes near them. A buried nail or screw can wreck a blade and throw fragments. A magnet and a careful look at both faces are worth the two minutes.
Children and pets
Small people and animals move without warning, and they are exactly at bench height. Keep them out of the work area while tools are running, not just nearby. Unplug tools and remove batteries when you walk away, put sharp tools down with the edge away from the front of the bench, and store blades, bits, finishes and solvents where a child cannot reach them. Off is not enough on its own; disconnected is.
When to stop
Stop when you are tired. Stop when you are rushing to finish tonight. Stop when you notice you are annoyed with a piece that will not fit. Almost every bad decision in a home workshop is made in one of those three states, and none of them improve by continuing.
Stop and get qualified help when the work is structural, when it is electrical, when you do not know what is behind the wall you are about to drill, or when you simply do not understand what the next step asks of you. This site will not tell you how to do electrical work or how to make something carry a structural load, and neither should any beginner guide. Bringing in an electrician, a builder or an experienced woodworker is a normal part of doing this properly.
If something goes wrong
If you cut yourself, get something in your eye, or have any difficulty breathing after working with dust, a finish or a solvent, stop immediately and seek medical advice. Keep the product label or container with you if a chemical is involved, so whoever helps you knows what they are dealing with. This site cannot give medical guidance of any kind, and nothing here is a substitute for it.
What to learn next
With the habits in place, the first real skill is accuracy: measuring and marking, where most beginner mistakes actually begin. The free First 5 Projects Roadmap lays out the whole beginner path in order, including which tools to own, borrow or rent.
Common questions
What safety gear does a beginner woodworker actually need?
Three things before anything else: eye protection worn whenever wood is being cut, drilled, driven or sanded; hearing protection whenever a power tool is running; and a fine-particle dust mask for sanding and for cutting sheet goods. Add clamps, because holding work with your hand instead of clamping it is one of the most common ways beginners get hurt.
Why should I not wear gloves when using power tools?
Because a glove can be caught by a rotating bit or blade and pull your hand into it, and a glove gives you far less feel for where your fingers actually are. The same applies to loose sleeves, hanging drawstrings, a necklace, a watch strap, and long hair. Roll sleeves, tie hair back, and take jewellery off before anything spins.
Is sawdust really a health hazard?
Yes. Fine wood dust is a respiratory hazard, not just a mess, and some species also cause allergic skin or breathing reactions in some people. Sanding and cutting sheet goods such as MDF produce the finest particles, which stay in the air longest. Work with ventilation and dust collection where you can, wear a fine-particle mask, and do not clear dust by blowing it about.
What do I do with rags after using an oil finish?
Do not screw them into a ball and drop them in a bin. Rags soaked in oil finishes can self-heat as the oil cures and start a fire. Spread each rag out flat, singly, outdoors and away from anything that burns until it is fully dry and stiff, or dispose of it exactly as the product label directs. Read the label before you open the tin, every time.
When should I stop and get someone else to do the job?
When it is structural, when it is electrical, when you are unsure what is behind the wall or inside the wood, or when you are tired, rushed or working around people who need watching. Stopping costs you an evening. Continuing when any of those is true is how the bad outcomes happen. Getting a qualified person in is a normal part of doing this well.
Get the free First 5 Projects Roadmap
Five projects in the order that builds confidence, the tool list split into own / borrow / rent / buy later, and a cut-list worksheet you can print and take to the timber rack.